RBBS - 3 R Projects Workflow
2022-02-28 Baboyma Kagniniwa
corps rbbs r
Part 3 of the coRps R Building Blocks Series (RBBS). All content can be found on this blog under the rbbs category as well as on the USAID-OHA-SI/coRps GitHub repo.
R Project Workflow with OHA/SI glamr Package
Introduction
This RBBS #3 session is a quick walk through of R projects workflows. This is OHA/SIEI specific workflow and can be modified for other purposes.
References:
glamr/Articles - Project Workflow
Initiate Project
For this workflow to work, you will first need to:
- Clone an existing R Project - See USAID-OHA-SI R Projects
- From your command line, Navigate to your projects folder
- Enter and execute this command
git clone <github-repossitory-url>git clone https://github.com/USAID-OHA-SI/Man-Hunt.git
- Navigate the newly created project folder and open the
.Rprojfile
Note*: alternatively, you could use github desktop to clone a project from github or other sources
- Create a new R Project from RStudio Menu
- Open RStudio
- Go to: File > New Project
- New Directory > New Project > Enter the directory name and choose the location of your project
- Existing Directory > Browse to existing folder
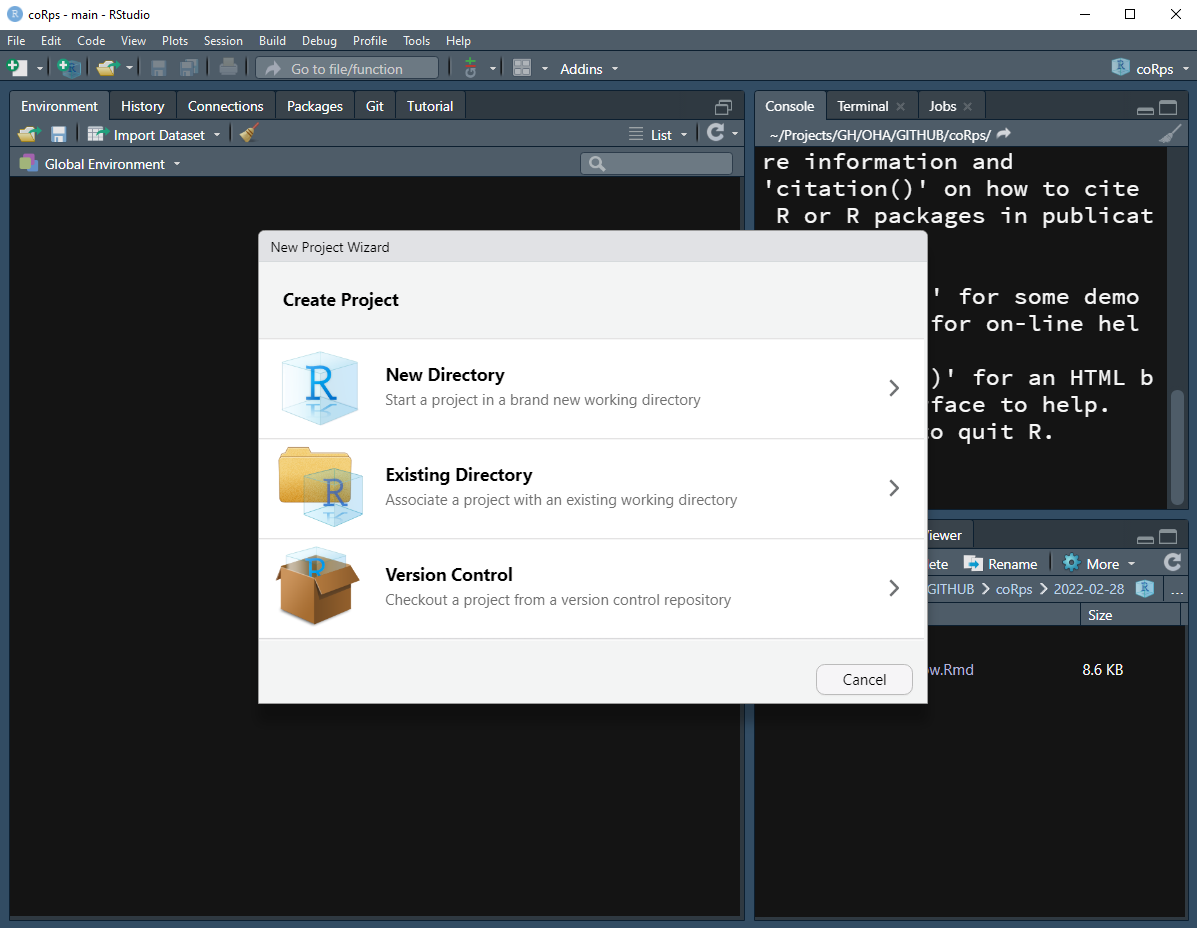
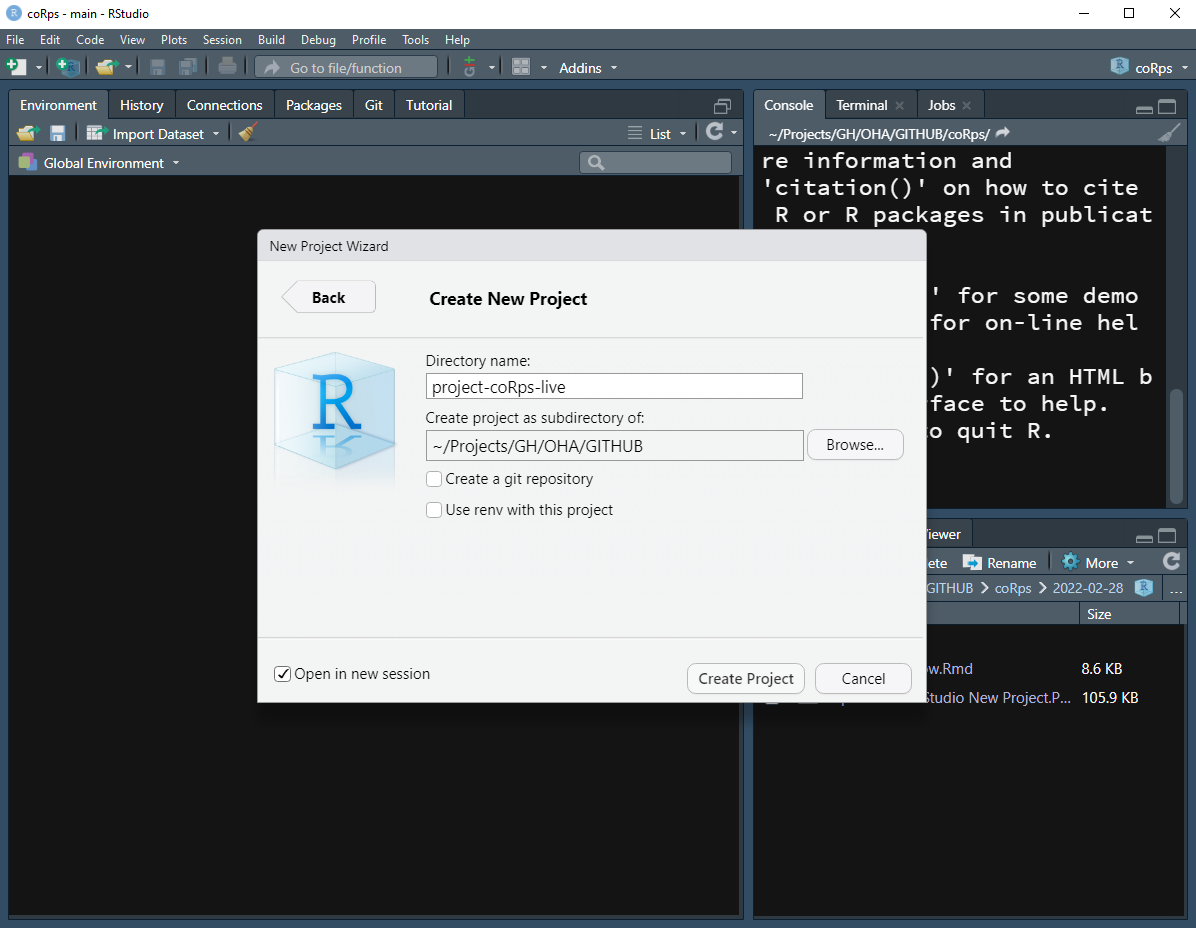
Note: If your RStudio is already opened from existing project, you may want to check the Open in new session checkbox to open the project in a new session.
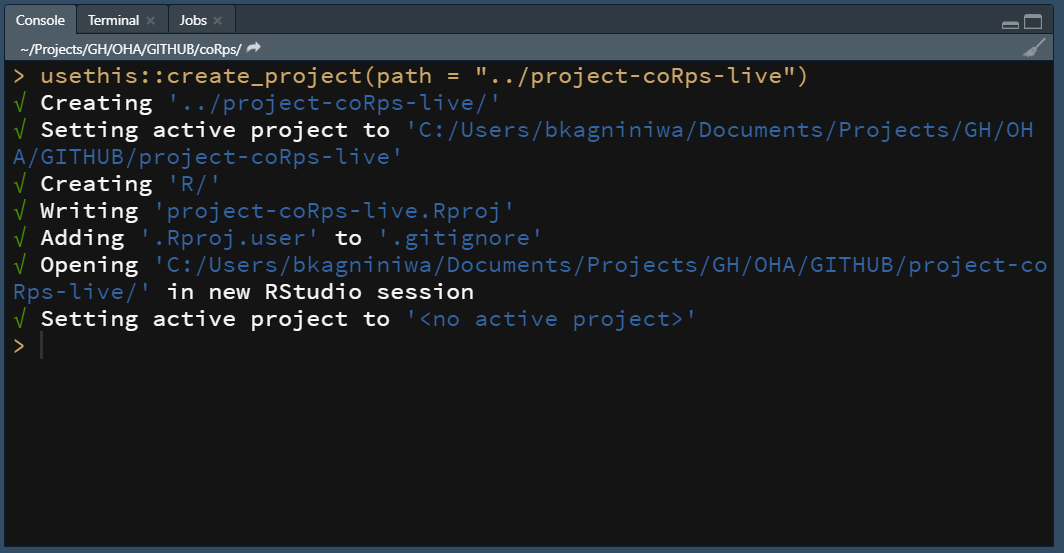
- Create a new R Project from RStudio Console:
- identify the directory of your project
dir_project <- "~/Documents/project-coRps-test"
- install
usethispackage if not already installed
install.packages("usethis")
- Load library and execute
create_projectfunction
library(usethis)

create_project(dir_project)
It’s also possible to execute a specific function from a package without loading the entire package. Just make sure the package is installed.
usethis::create_project(dir_project)
Enable Version Control for your New Project
For this session, we will be using git and github
Check out Jenny Bryan’s Happy Git and GitHub for the useR.
You an also use a UI tool like GitHub Desktop or GitKraken. If you have git installed and integrated with R, you can again use usethis to set everything up.
help info on getting started with git
use_git() #this prompts a restart of your session
use_github(organisation = "USAID-OHA-SI")
Define the distribution license for your new project
This step is only required if you plan on sharing your project with the world
usethis can be use to set up a license for the project.
We use the MIT license which calls for attribution for downstream uses of your work and specifies that the software is provided as is.
Note: the license can also be setup from github
usethis::use_mit_license(copyright_holder = "Dr. Raj Shah") #add your name
SI Workflow
SI workflow consist of separating your project’s code from raw and intermediate datasets, outputs, documents, and notes. This allows us to consistent and facilitate collaboration, and also help safeguard sensitive information.
Note: you will need to install the package if not already installed:
remotes::install_github("USAID-OHA-SI/glamr")
#or
remotes::install_github("USAID-OHA-SI/glamr", build_vignettes = TRUE)
SI Setup - Project Configuration
library(glamr)
si_setup()
# or
glamr::si_setup()
si_setup function is what you need to configure your project.
The function contains three sub-function:
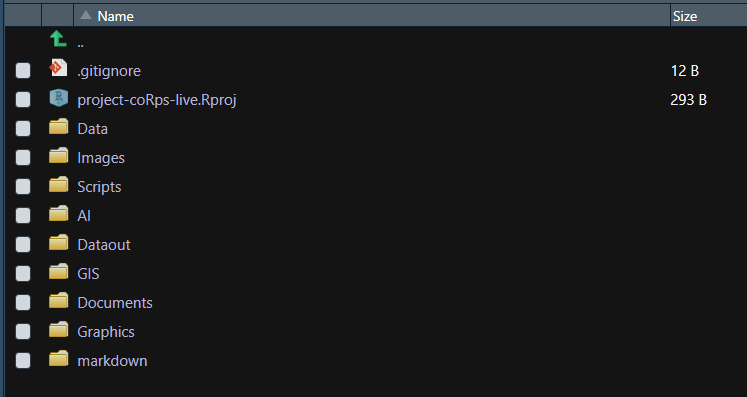
The first one, folder_setup() initiates the main folders we use for our work:
- Data - where any raw/input data (xlsx/csv/rds) specific to the project are stored
- Dataout - where any intermediary or final data (xlsx/csv/rds) are output as a product of your code
- Scripts - where all the code (R/py) are stored (if there is a local order, make sure to add prefixes to each script, e.g. 00_init.R, 01_data-access.R, 02_data-munging.R, …)
- Images - any png/jpeg visual outputs from your code
- Graphics - any svg/pdf visual outputs that will be edited in vector graphics editor, eg Adobe Illustrator or Inkscape
- AI - any ai files or other files from a graphics editor (exported pngs products will be stored in Images)
- GIS - any shp files or other GIS releated inputs
- Documents - any docx/xlsx/pptx/pdf documents that relate to the process or are final outputs
- markdown - exported md files from a knitr report
If you clone from GitHub not all the folders may exist there, so we recommend running folder_setup() on its own to establish the same organization on your local machine. The reason we have created this into a function is to ensure uniformity across our projects and know what to expect when we pick up someone else’s work (or our own work from the distant past).
The next function that is run is setup_gitignore(), which creates a .gitignore file in your project. The primary purpose of this file is to ensure that our data and outputs are not being published to the web. By default after running si_setup() most data formats/folders will be kept from being published. Below is what the .gitignore file will look like.
  #R basics
  .Rproj.user
  .Rhistory
  .RData
  .Ruserdata

  #no data
  *.csv
  *.txt
  *.rds
  *.xlsx
  *.xls
  *.zip
  *.png
  *.twbx
  *.pptx

  #nothing from these folders
  AI/*
  GIS/*
  Images/*
  Graphics/*
And the last component from si_setup() is to add a standard USAID disclaimer to your project’s README.md file (and creates this file if its missing).
From a project standpoint, now you’re good to go.
Accessing Data
Our SI work revolves around using the MER Structured Datasets, which are large, cumbersome files. A best practice when working on projects is to store the data you use within that project so its all self-contained. However, since most of our work revolve around a couple of massive datasets (OUxIM, PSNU, PSNUxIM, NAT_SUBNAT, FSD), it makes more sense for us to store these datasets in a central location on our machines rather than in each project.
The problem now is that where I store my MSD files is going to be different than the path to yours. To solve this dilemma, we use a function called si_paths() which access the paths we have stored locally to where our MSDs or Downloads are for instance. This way, when you pick up a coworkers code, you don’t have to change any of the file paths, it just works.
Those local paths will be set once and stored in your .Rprofile. To do so, you will run set_paths to store all the relevant paths (you can ignore any that aren’t relevant to you).
set_paths(folderpath_msd = "~/Documents/Data")
Running this will open your .Rprofile and you’ll be prompted to paste the pre-copied code into the .Rprofile save and restart your session.
Note: You can also use relative paths to help you work with different OS.
. = current directory
./.. = go to parent directory from current
With the path stored, you can use si_path() to retrieve the path to your MSD folder (as the default)
glamr::si_path()
#or
glamr::si_path(type = "path_msd")
Note: when working with Rmd files, your current directory will be the location of your file.
and then use glamr::return_latest(), which looks in the provide folder path for the latest version of a file that matches the pattern you provided.
dir_msd <- glamr::si_path()
glamr::return_latest(folderpath = dir_msd, pattern = "PSNU_IM")
In this case, we can pass in that we want the last OUxIM MSD and it will return the file path which we can pass into readr::read_rds()
dir_msd <- glamr::si_path()
file_msd <- return_latest(folderpath = dir_msd, pattern = "OU_IM")
df_msd <- vroom::vroom()